![]()
👋 Hi there, welcome to Discover!
Discover is an optimization tool built to work with Rhino Grasshopper. It is being developed by Colidescope as free software with the goal of promoting performance-driven automated design workflows in the architecture, engineering, and construction industries.
You can find a general overview of Discover’s features on its product page. You can also find step by step video tutorials for installing Discover and connecting it to your Rhino Grasshopper models on the Colidescope learning platform.
Requirements
- PC running Windows 10 64-bit
- Rhino 6/7/8 - Discover can probably be made to work with Rhino 5 as well as the OSX version but it is not supported at this time.
- Python 3.9
- Web browser (such as Chrome or Firefox)
Installation
Installing Python
Currently Windows does not ship with Python, so if you’ve never used Python or you’re not sure, you will need to install a version of Python on your computer.
Discover has been tested using Python 3.9.6 and is not guaranteed to be compatibile with more recent versions of Python due to possible compatibility issues with some of the Python libraries Discover uses. If you’d like to use Python 2 it can probably be made to work but it is not supported at this time. If you already have Python 3 version 3.9 or lower installed you can skip to the next step.
- Go to the Python download page and select the latest Python 3.9 release (3.9.6 at time of writing).
- On the download page, scroll down and under ‘Files’ select and download the Windows x86-64 executable installer.
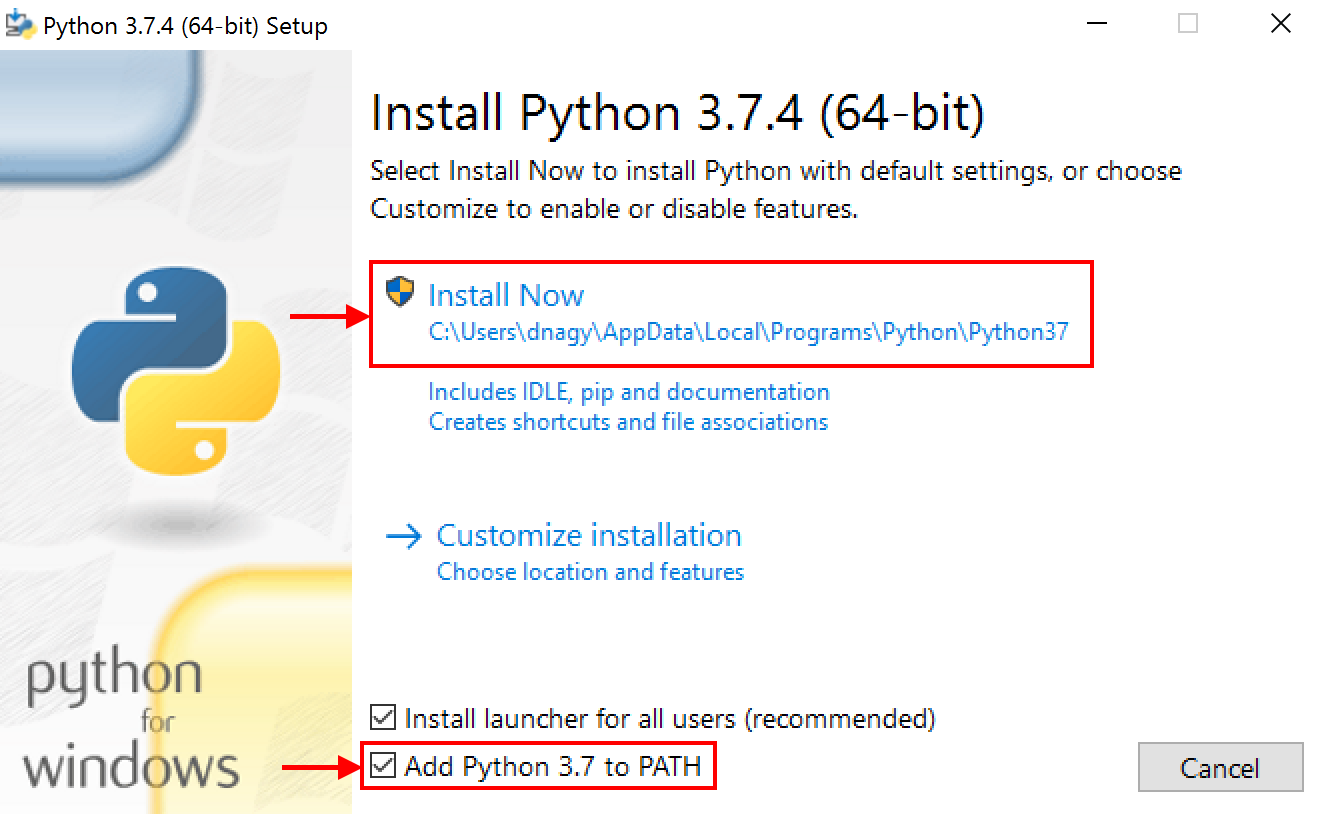
- Run the .exe installation file to install Python on your computer. IMPORTANT: make sure you select the option to “Add Python 3.X to PATH”. Discover will not work if this is not checked.
Downloading Discover
- Click on the download link on the left to download a zip file with the latest release of Discover
- Unzip the file to a new folder on your computer.
Installing dependencies
- Double-click the
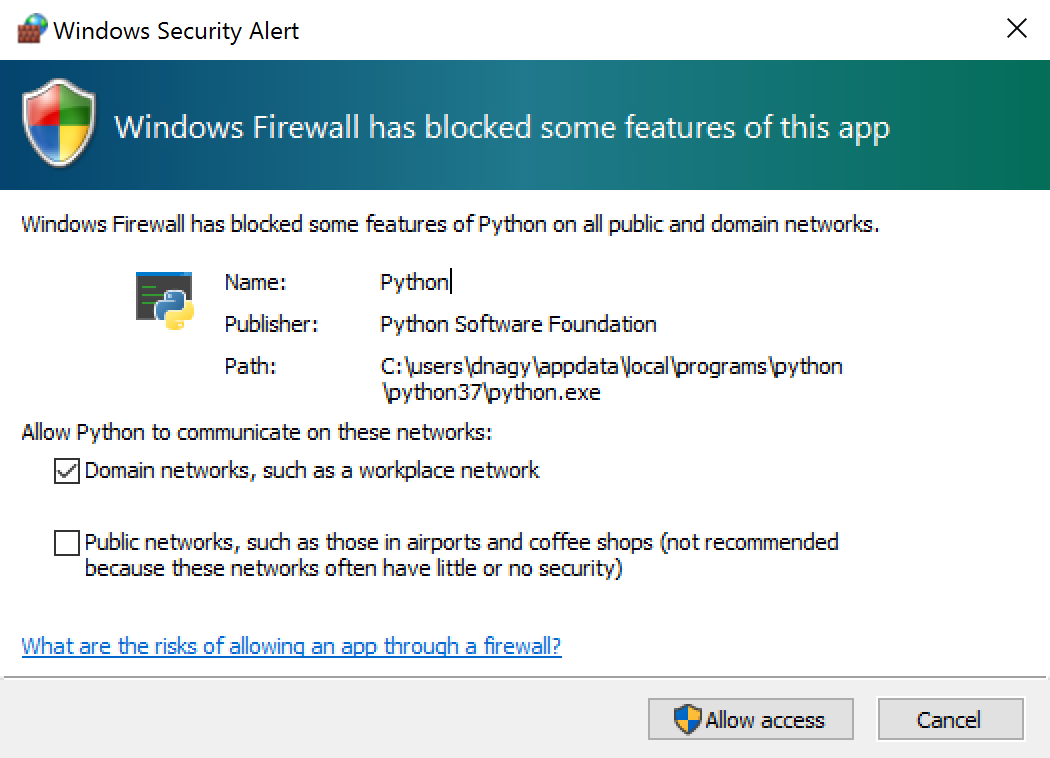
discover.batscript in the folder where you unzipped Discover. This will launch a new Command Prompt window where the Discover server will run. The first time you run the script it will install any dependencies which are needed for Python. This only needs to happen once. After checking the dependencies the script will start the Discover server and launch the app in your default web browser. - Windows may ask for admin privileges the first time you run the server. Make sure to click ‘Allow access’. You should only have to do this once.
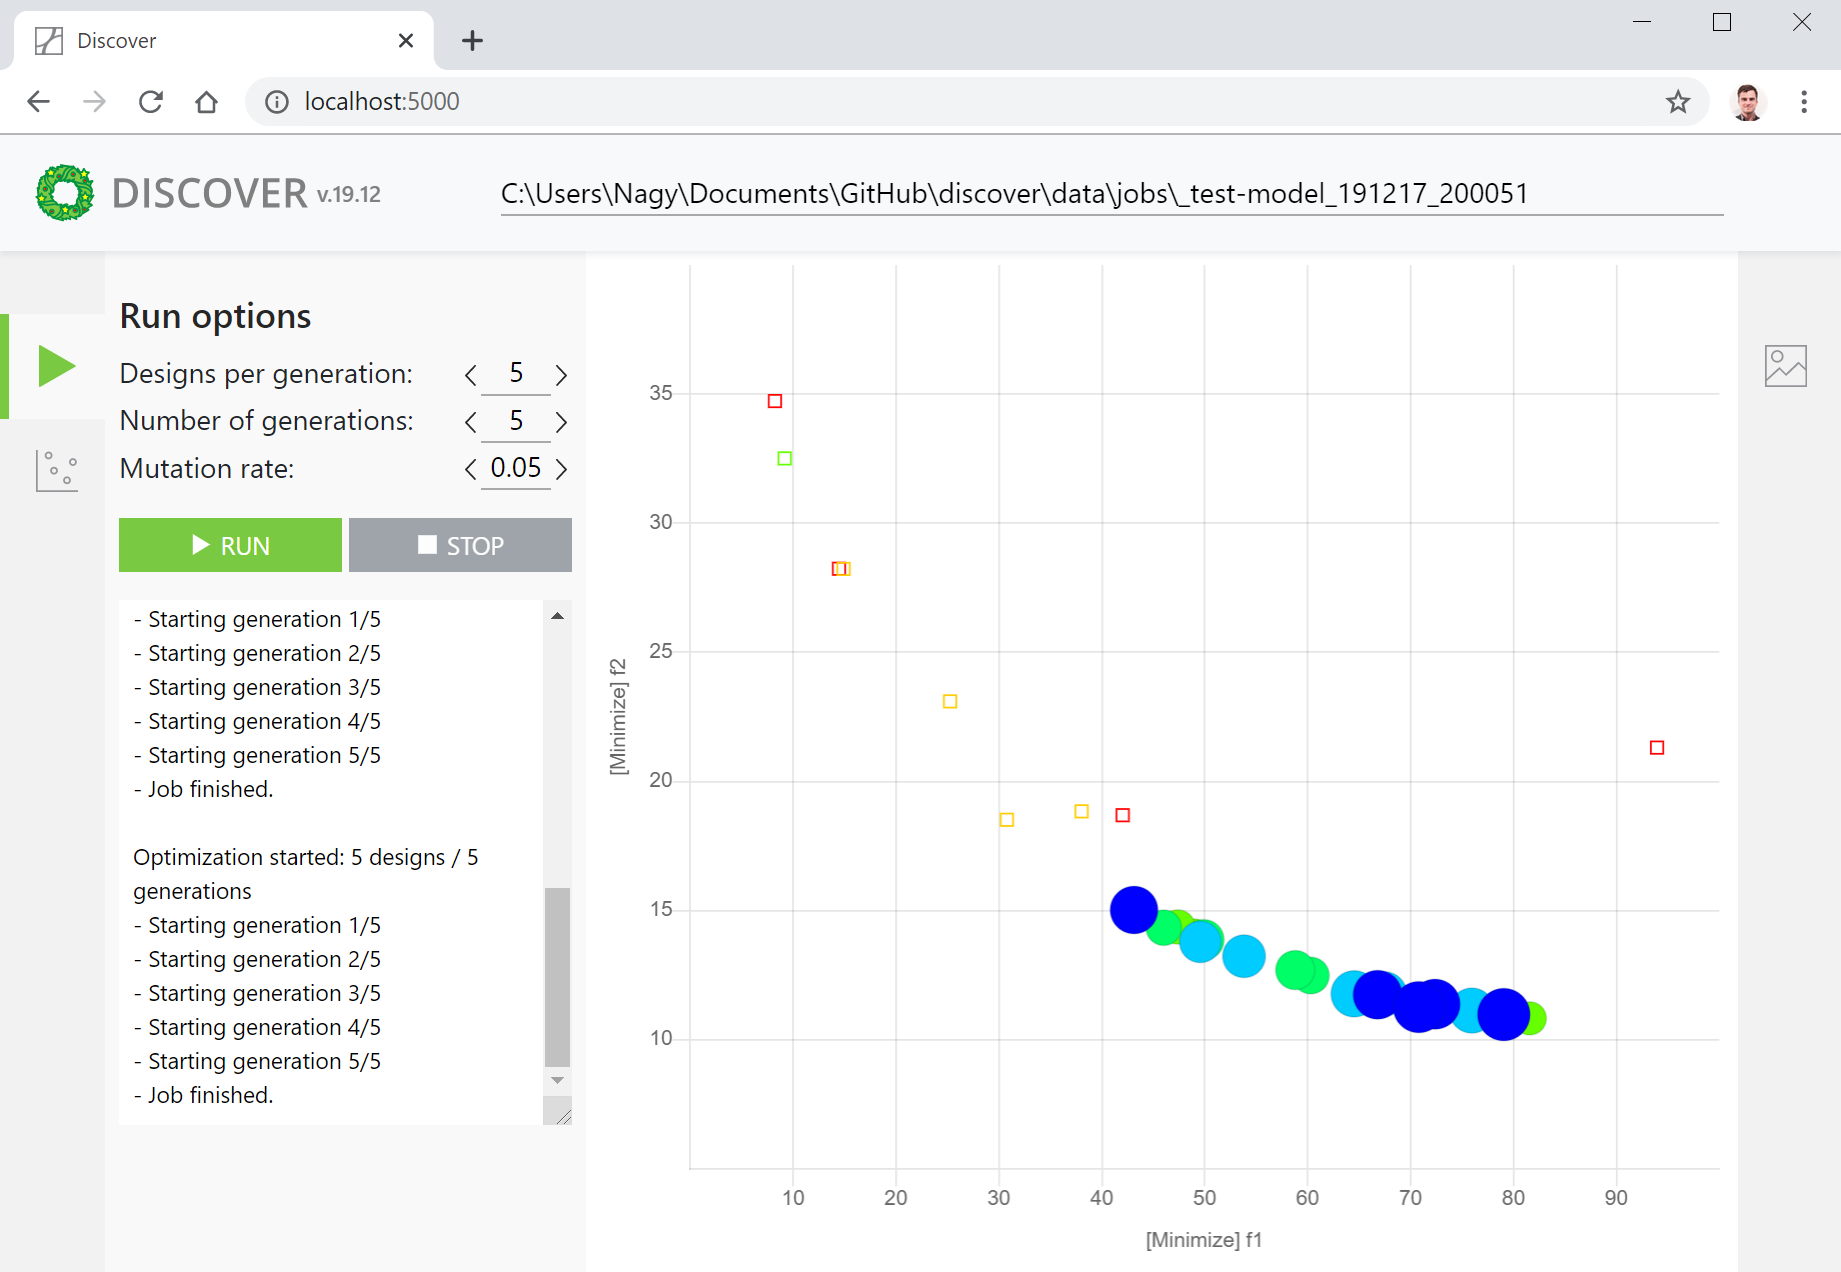
You should now see the Discover interface appear in the launched browser window. To make sure everything is working, run a default test optimization by clicking “Run”. You should see the scatter plot populate with test data similar to this:
If you initially get a blank page or a “site not found” error, wait a few moments for the server to boot up and then try to refresh the page. If the interface still does not appear, check the Command Prompt window. If you see any errors, take a screenshot of the Command Prompt window and send it to the email address provided in the support section of this page. If the Command Prompt window is no longer running, follow the instructions in the support section of this page.
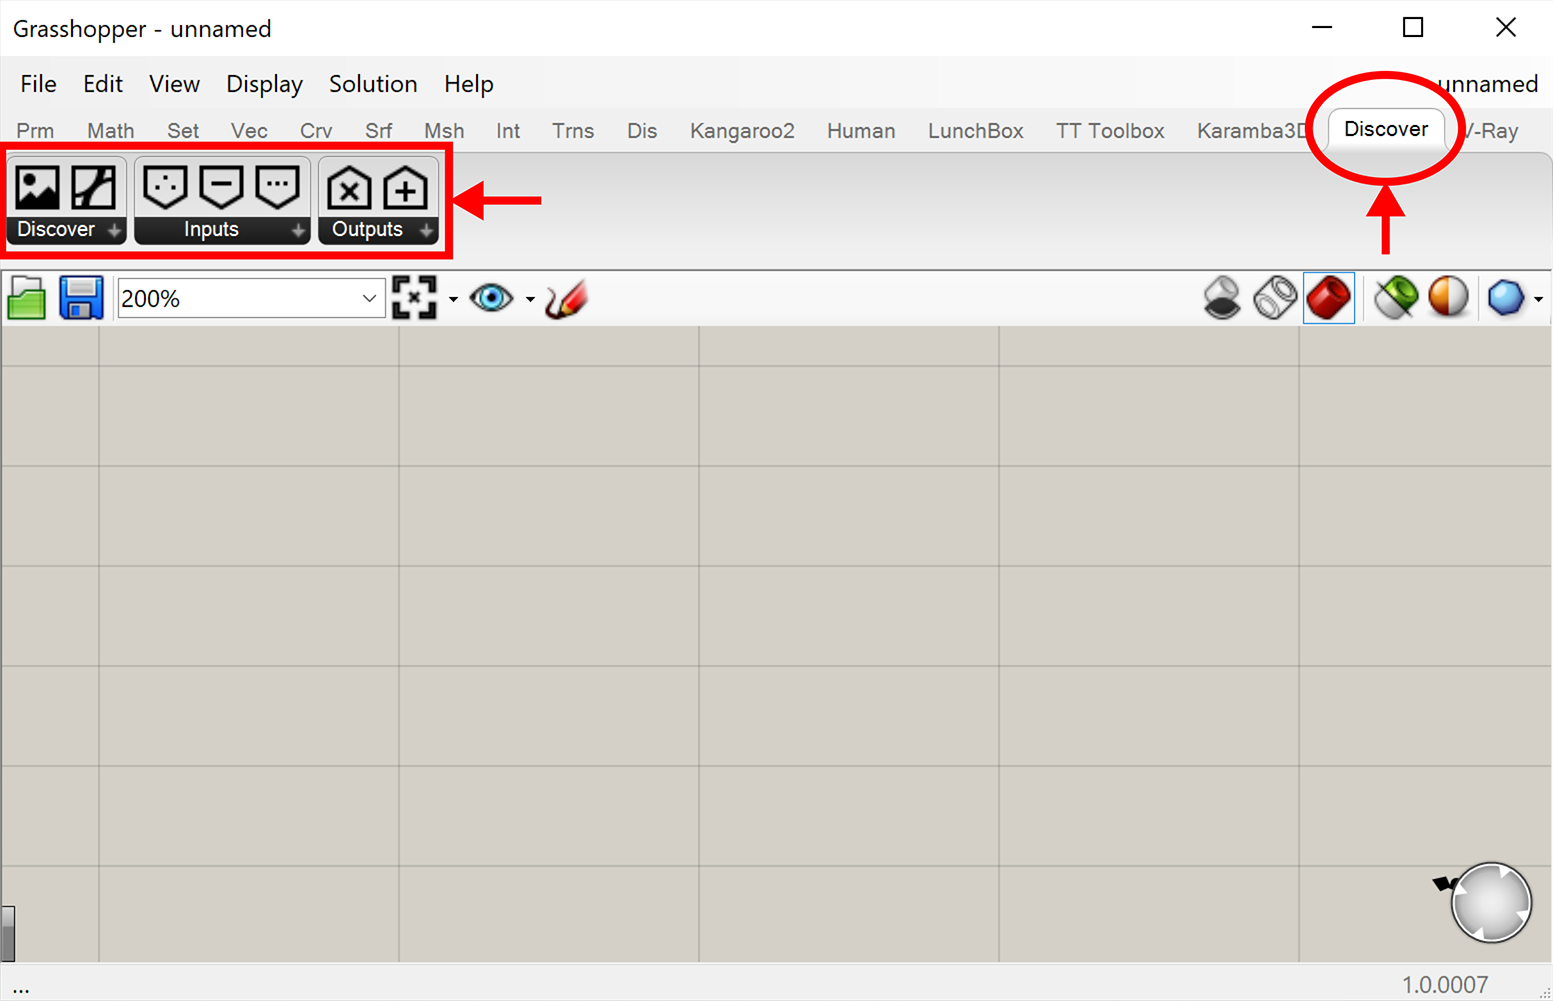
Installing the Grasshopper components
Discover includes a Grasshopper library of custom components which allows the Discover server to communicate with your Grasshopper model. To install the components:
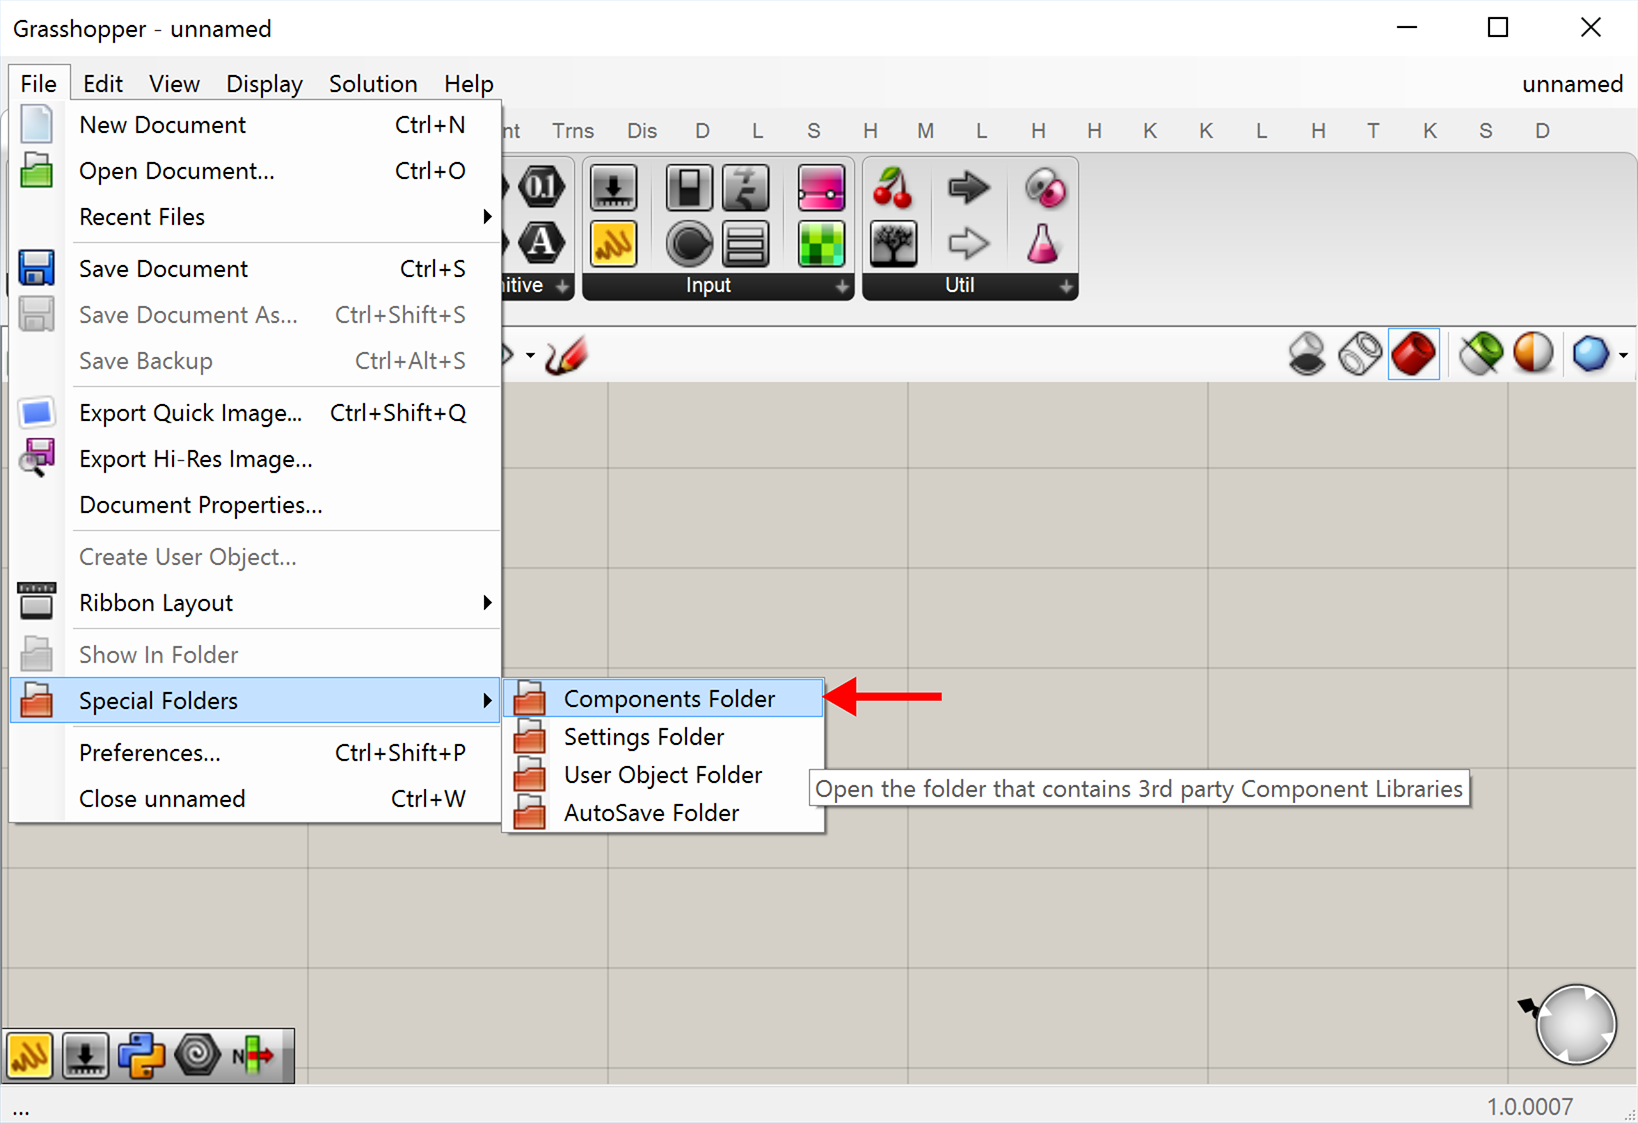
- Open Grasshopper and go to
File -> Special Folders -> Components Folder. This will open the folder where Grasshopper stores its custom plugin files. - Copy all the files in the
/Grasshopper Pluginfolder of the Discover zip file to Grasshopper’sComponents Folder. - Restart Rhino and Grasshopper. You should now see a new tab in the ribbon called ‘Discover’ with the 7 Discover components loaded.
Working with Discover
Starting the server
Double-click the discover.bat script in the folder where you unzipped Discover. This will open a Command Prompt window, start the Discover server, and launch the app in your default web browser. Make sure to keep the Command Prompt window open while you’re using Discover.
Shutting down the server
When you’re done using Discover, close the Command Prompt window to shut down the server.
Known issues
- If you’re having issues with the Discover tab not appearing when you start Grasshopper, this may be due to the Discover.gha file being blocked by Windows. This is a security feature of Windows when downloading unfamiliar file types. It should not happen if you download the ZIP file on this site, but may happen if you download the Discover.gha file directly from Food4Rhino or another source. To fix this issue, right-click on the Discover.gha file in your Components Folder, go to ‘Properties’, and click the ‘Unblock’ button in the lower right corner. If you don’t see this button the file is not blocked and you are having a different issue.
- During the optimization process, Discover writes certain files to a local directory for each computed design. The location of this directory is based on the location of the Grasshopper (.gh) file. There is a known issue where if your Grasshopper file is in a folder which is hosted on a network or a cloud sharing service like Dropbox, the writing process can take too long, causing the components and server to get out of sync. This can result in the optimization process stopping or many of the same designs being generated at once. If you experience these issues, make sure your Grasshopper file is located in a local folder on your computer and is not being shared over any network.
Support
Disclaimer: This program is distributed for free in the hope that it will be useful, but without any warranty or guarantee that it will work the way it’s described or work at all.
If you have trouble installing Discover or getting it to run, please follow these instructions:
- Go to the folder where you unzipped Discover. This is where the ‘discover.bat’ file is.
- While holding SHIFT, right click anywhere in the folder (not on a file) and select ‘Open Command Prompt window here’ or
‘Open PowerShell window here’(12/24/2019: There seem to be issues with running the virtual environment commands from PowerShell. If you don’t see ‘Open Command Prompt window here’ open Command Prompt manually by searching for it in the Windows Start menu. Then navigate to the local Discover folder by typing ‘cd ‘ followed by the path - for example ‘cd C:\Downloads\Discover’ - Type this command and hit Enter:
python -m venv env - Type this command and hit Enter:
.\env\Scripts\activate.bat - Type this command and hit Enter:
pip install -r requirements.txt - Type this command and hit Enter:
python server.py - If you see an error in the Command Prompt at any point during this process, take a screenshot of the command prompt and send it to support@colidescope.com with a description of the steps you took during installation.
If you find a bug in Discover, you can submit it to the development team using the link below. If you include an email address we will notify you when we release a fix.